Macramé Crafts for Kids
Two trendy crafts that require few supplies and minimal time.
The intricate knots and weaves of macramé projects might look challenging, but with a little bit of practice and some patience, your little crafter (and even most grownups) can tie into this trendy craft of Middle-Eastern origin. To gather some macramé inspiration, we tapped Delanie Holton-Fessler, an arts and craft educator and the owner of The Craftsman and Apprentice, a Denver-based craft studio.
Holton-Fessler believes macramé is the perfect craft for kids, giving them practice with knot tying and pattern following. Her best tip for beginners: “Go slow and don’t worry if it’s not perfect. You can always untie and try again.” That certainly rang true when we made these projects, and the challenge and opportunity to get creative made these crafts loads of fun.
Plant Hanger
- Time Commitment:
- 5 to 10 minutes
- Skill Level:
- Easy peasy. If you can tie a knot and use a ruler, you can do this!
You Will Need:
- Four, 9-foot lengths of 3mm macramé cord
- Scissors
- Plant and pot that’s 5 to 7 inches in diameter
Directions:

1. Fold cords in half and tie an overhand knot about six inches from the fold. This will secure all eight cords and create a loop that will be used to hang your potted plant.

2. Measure 18 inches from the top knot, and using two strands at a time, tie an overhand knot.

3. Measure 6 inches from new knots. Using alternating strands, tie two strands together using an overhand knot.

4. Measure 6 inches down and knot all strands together using an overhand knot.
5. Nestle your plant into the basket shape that has formed.

Key Chain
You Will Need:
- Two, 6-foot lengths of 3mm macramé cord
- One key ring
- Scissors
- Three beads, with holes big enough to feed the cord through
- Time Commitment:
- 15 to 20 minutes
- Skill Level:
- A little tricky. If you can tie your shoes, you can get it down!
Directions:

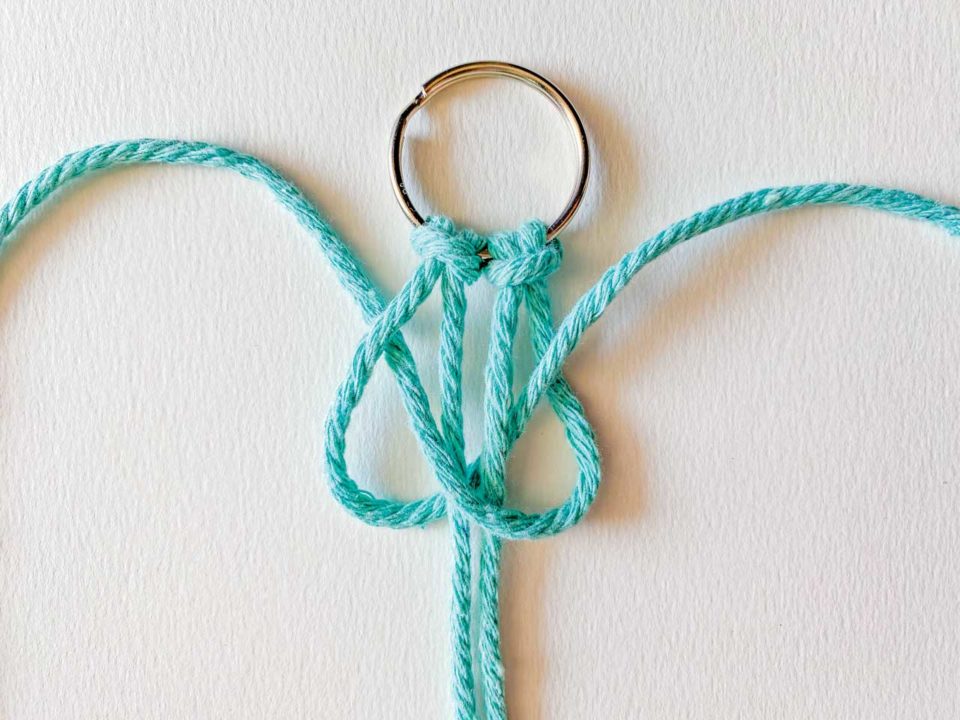
1. Fold both of your cords in half. Following the Lark’s Head Knot, place the loop of the first cord in front of your key ring. Pull the two ends through the loop from behind the ring and tighten. Repeat with the second cord.

2. Lay the key ring and four strands on a flat surface. Following the Half Square Knot style, take the far right strand and lay it over the middle two strands, creating a loop on the far right. (The center two cords will always stay in the middle. You’re only using the far right and far left cords to create this knot).

3. Take the far left strand over the right strand and under the middle two strands.

4. Pull the same left cord up through the loop on the right. Pull the far left and far right strands tight while keeping the middle two strands flat and parallel. (Your completed knots will start to twist, which is the desired look of a Half Square Knot).

5. Repeat steps 2 through 4 about six times, then add a bead to the center two cords. Continue with six more Half Square Knots, then add another bead. Complete six more Half Square Knots before adding your final bead. Add six more Half Square Knots underneath your last bead.

6. Finish by pinching the four strands together close to the bottom knot. Then, tie the four strands together in an overhand knot. Cut the remaining ends to desired length. Unravel to create fringe. (Tip: Wrap the ends of your cords with embroidery thread for a finishing touch. See photo top left.)
Surprise Someone!
These crafts make adorable gifts for friends, family members, babysitters, or teachers. Tie a tag to the plant hanger or key chain and encourage your child to give it to someone they care about. You can even add a silly yet sweet note that says, “My day would knot be the same without you.” These days, it’s the little things that mean the most.


